
Plastic Palette Mod for easier mixing
- Danny McShane

- Jul 11, 2025
- 3 min read
I’m still trying out new palettes from time to time, though I found myself returning to the Fisk (or generic) lightweight folding one I mentioned in my first article on palettes. The only real drawback I find with the pattern is the flat shallow mixing wells for when I want a largish wash.

I‘d been trying to find a deep-dished version since I started painting.
And now I have. Well, not found exactly, but made. I’m not sure what the plastic of the Fisk palette is, but I decided to try out a modification when the hinge gave up on my first one (after 3 years of practically daily use so no shame to it). The plastic, whatever it is, is thermoplastic rather than thermosetting, so it can be heated and reshaped. This allowed me to make spoon shaped impressions in the lid’s mixing wells -dishing them so they hold more paint mix centrally (rather than in the odd ‘trough’ at the long edge.) The plastic is malleable enough when warm to be able to make the dished wells and keep the lid edges sufficiently aligned for the palette to close normally. They lid was never airtight, but closure does help avoid some mess as I prefer to use wet tube paint in my palette.

If you’d like to try this, you’ll need a candidate palette (cost £3-£5 if you shop around online), a hot air gun or hairdryer, a serving spoon or metal ladle and a sponge or spray and cold water. I used a Black & Decker Workmate to support the palette lid edges as I gently pressed the hot spoon into the well, but any support you can rig would work. Two books or pieces of flat wood would do.
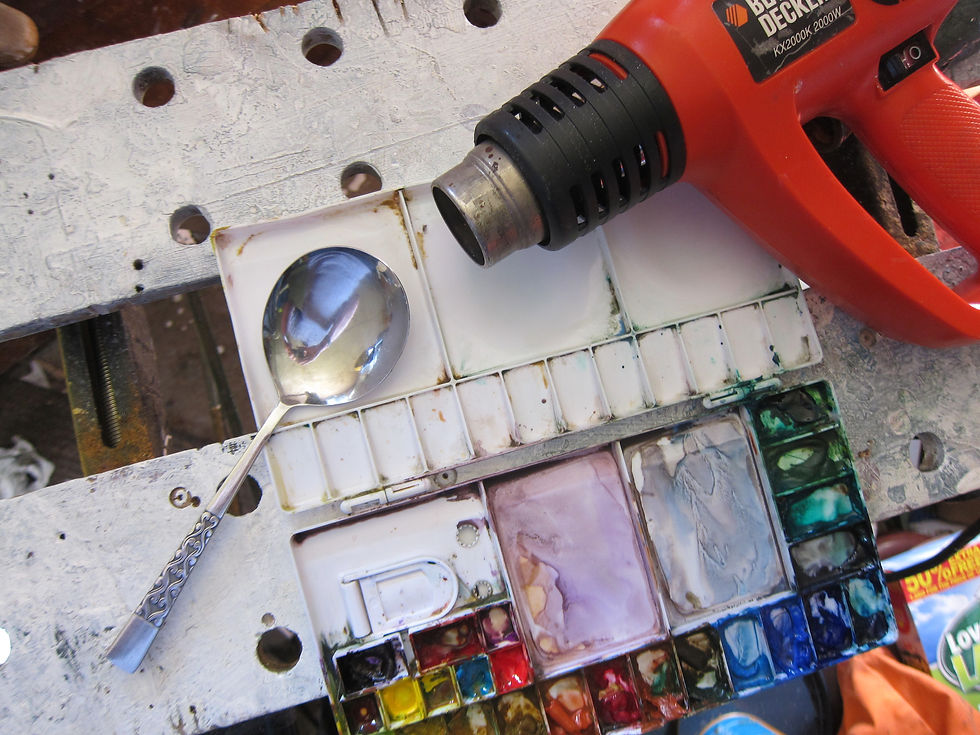
I suspect the mod is risky, if simple - but I’ve managed 2 out of 2 on the palettes I’ve tried this with. At the risk of making it sound more complicated than it was, here’s how I did it:
1. Set up the palette lid so the long edges are supported. I sat my palette over the gap on a Workmate. You could sit it between two pieces of wood (or books, or anything moderately heat proof). Just so there is clearance below the surface to let you press it down a bit.

2. Gently heat one well area and the ladle. This is the trial and error bit -you want the plastic to reach deformable temperature, but not to go too floppy. Move the heat around a lot, and don’t start to fiercely, it doesn’t take very much (though you can burn your fingers on the hot plastic at the malleable temperature). Judge the temperature by continually trying to press the surface with the ladle and you’ll reach a point where it moves and you can press the ladle in to it to give you a dished surface. If you can heat the area you want to move more than you heat the sides of the palette that will help avoid the lid buckling. Heating the ladle is probably safer but doing both worked for me. Depending on the shape of you ladle you may want to rotate it as you press to help prevent sticking.

3. Once you have made the dent you want, use the sponge or spray to cool the surface and solidify the plastic. (I didn't have enough hands to take a photo of this step!)
4. Move on to the other wells and repeat.
5. If the lid has gone out of alignment during the process, you can heat it with emphasis where it is most bent and then reshape it by closing it and cooling it.

I only made the spoon shaped depressions on the three lid wells so the palette can sit on a flat surface if necessary. I do usually hold it when painting, but it's easier to fill and clean if it sits stable when I need it to.
And that’s it.

If you find the plastic wells bead up with paint mix after this 'heat treatment' (as they do on a new palette) I’ve found cleaning with toothpaste gives a good wettable surface again
Happy Painting.


Wow Danny! I'd never have thought of that, nor even thought it possible but I saw you using your palette at our art club and now want one of my own. Good article too. All the best, Iain P.
Thanks Danny! I really like how you make and modify stuff to suit yourself and how you paint. It's very inspiring to see your 'have a go' approach in action and the practical results you get. I really appreciate the articles and photos -your plein air kit, sunshade, wristwarmers and now this -and love the no-nonsense utlity look of everything. Keep on giving us ideas!
Bob S.